
What Enshrouded 1.0 changed about bosses, including the reworked Albaneve Summits fight, stun tactics, and boss health recovery.
Enshrouded Bosses in 1.0: Order, Locations and Tactics
1.0 reworks one boss in detail and changes the rules that apply to every boss fight. The Albaneve Summits encounter got a substantial health nerf, a new exhausted phase that lets melee players land real damage, a wider arena with grapple hook anchors, and a reworked stun meter where stun arrows and shock damage now work far better. Separately, every boss in the game now recovers health over time after a wipe instead of snapping back to full, which rewards a fast second attempt.
Enshrouded is the survival action RPG from Keen Games, sold on Steam for PC and the PlayStation Store for PS5. The official site hosts the patch notes.
The short version:
- The Albaneve Summits boss was reworked: less health, more melee openings, a safer arena.
- Its stun meter now responds well to stun arrows and shock damage, not just parried projectiles.
- The weak point on its back now works for all weapons instead of arrows only.
- Bosses recover health over time after a wipe, so a fast retry keeps some of your progress.
- The final 1.0 encounter sits behind Cinder's Cradle and unlocks Flame Level 11.
Boss Order and Where Each One Sits
The honest starting point is that the official 1.0 changelog does not publish a numbered boss list or a named boss order. It details one boss encounter, the Albaneve Summits fight, and it refers to a final encounter gated behind the new region. If you want a clean list of boss names in order, that list is community work rather than something the developer shipped in the patch notes.
What the changelog does give you is the structure that bosses hang off, and that is enough to plan a run.
Progression in Enshrouded is tracked by the main quest and by the biomes you unlock as you travel. 1.0 opens the map fully. North of the Veilwater Basin, past gates that used to be closed, sits the new region Cinder's Cradle. That region is where the final encounter lives, and it is the last progression gate before the endgame. Everything before it is the climb through the existing biomes.
Two locations got new Hollow Halls in 1.0: one in the Albaneve Summits and one in the Veilwater Basin. Hollow Halls are long-form dungeons with their own bosses and rewards, and their weapons were reworked in this patch to hit the Hollow faction especially hard.
A practical way to read your own progress without a boss list: follow the main quest markers, note which biome you are in, and treat any arena-shaped space with a wide floor as a boss room.
Keen's changelog names the Albaneve Summits boss and the final encounter but does not rank the rest. Treat any numbered list you find as community consensus.
Official source: Enshrouded 1.0 changelog
How to Prepare Before a Boss Attempt
Preparation in 1.0 follows the same rules as the rest of the game, with a few specifics that matter more at boss scale.
Bring upgraded gear, not just high-level gear. Players cap at level 50 and fully upgraded equipment reaches level 55, so an old set you have invested upgrades into usually outperforms a fresh drop you have not touched. Legendary items also now require legendary runes one upgrade step later than before, so plan your rune spending before you commit a legendary piece to a boss run.
Bring the right damage type. Enemy susceptibilities were reworked in 1.0, with more consistency by faction and more individual resistances on elite and heavy enemies. Bosses are the extreme end of that. If your damage type is being resisted, the floating text will now tell you at the 20 percent threshold, so watch for it early and swap before you are committed.
Bring stun tools if the fight rewards them. That is now genuinely true for the Albaneve Summits boss, and the patch added journal entries that hint at parrying enemy projectiles and at that boss's weaknesses. Read the journals in the region before you go in.
Bring food and a plan for the Shroud. Long fights are where a Shroud timer turns from an annoyance into a death sentence, and 1.0 reduced how much stacked time-extension effects give you in total while making hourglass capsules far more common. One capsule is worth roughly seventy percent more time, so carry one into an arena.
The Reworked Albaneve Summits Fight
This is the one boss the 1.0 changelog describes in detail, and the changes are all aimed at the same complaint: the fight used to punish melee players and reward one narrow tactic.
The health nerf is the headline. Keen calls it a substantial reduction, which turns a fight that was a war of attrition into something a prepared party can finish in a reasonable window.
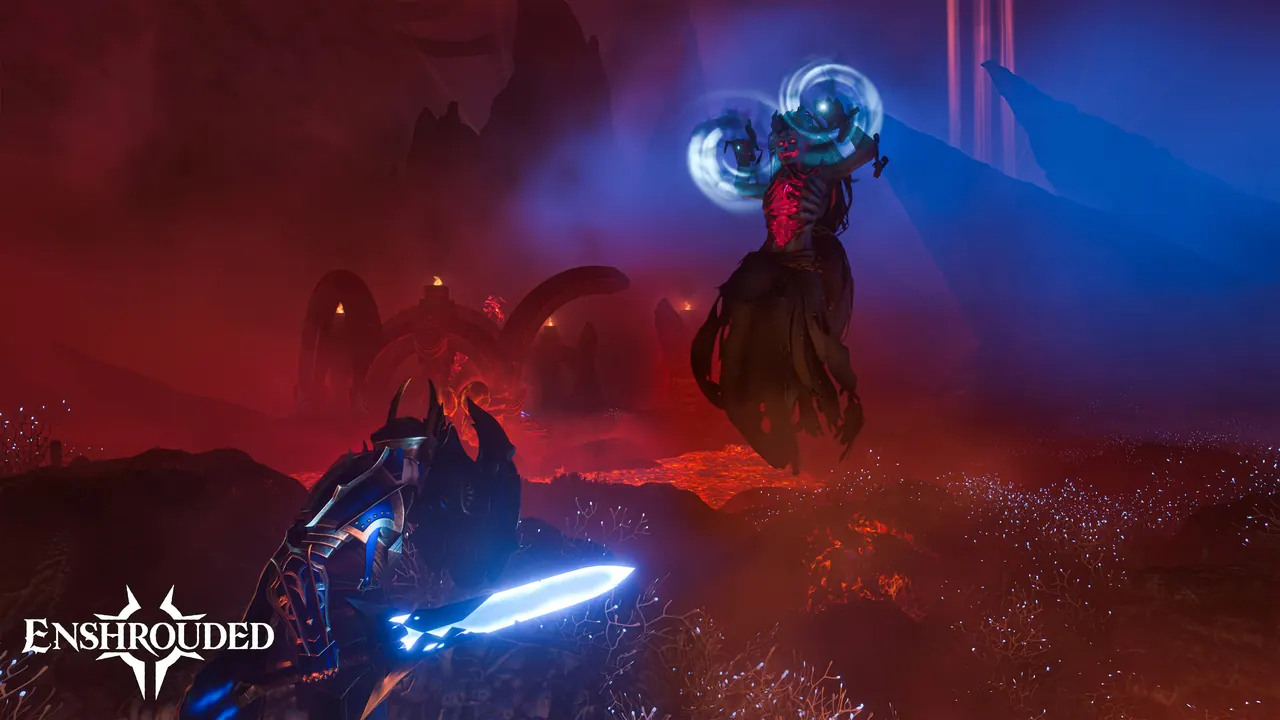
The new exhausted phase is the more interesting change. The boss now has a phase where it stands on the playable area and is visibly exhausted, and during that window melee-focused players can get in close and land heavy damage before the regular attacks resume. The changelog notes that this phase is signaled by a specific animation, so watch the body rather than a health threshold.
The arena itself was rebuilt to be fairer. The walkable area is wider, so you are less likely to fall off the edge or get shoved over it. Grapple hook anchors were added so you can pull yourself back to solid ground after a knockback or a glide. And the Shroud that used to cover part of the lair has been lowered below the walkable surface, because the visual noise made it hard to track what the boss was doing.
Two smaller fixes round out the fight. The projectiles now follow an improved flight curve, which means they can reach players standing very far away, so retreating to the far side of the arena is no longer a safe answer. And a bug that could reset the encounter while players were still present was fixed, along with animation, collision and hard-lock issues on the boss body and legs.
The Albaneve Summits boss now has a phase where it stands on the playable ground, exhausted. That is your melee window. Recognize the animation and close the distance instead of backing off.
Parrying Projectiles and Stun Options
The stun meter on the Albaneve Summits boss was reworked, and this is the change that opens the fight up to more than one build.
Before 1.0, the best and fastest way to stun the boss was to parry its projectiles back at it. That is still a powerful option, and the patch added journal entries that explicitly hint at it. If you have the timing, parrying remains the cleanest route to a stagger.
What changed is that it is no longer the only good route. Stun arrows and shock damage now work significantly better than before, so a ranger can feed the stun meter with stun arrows and a caster can feed it with shock damage instead of waiting for a melee player to land a parry.
The fight also supplies its own resources. Crafting resources were added to the loot of the vultures at the boss, and those resources help replenish stun arrows and lightning spells. In practice you can top up your stun tools mid-attempt rather than running dry and losing the run.
Put together, the stun system in 1.0 rewards a party that spreads the job. Keep one player parrying when they can, have the ranged players hammer the stun meter with stun arrows, and let a shock-damage caster add to it. The new spells guide covers the shock and summon options that fit this plan.
Parrying is still strong, but 1.0 made stun arrows and shock damage genuinely competitive. A group that only parries is leaving most of its stun contribution on the table.
Boss Health Recovery After a Wipe
This is the change that affects every boss in the game, not just the reworked one, and it is easy to overlook.
In 1.0, enemies recover their health over time once players exit the combat area instead of resetting to full instantly. For ordinary enemies this barely matters, because their health pools are small and the recovery is not going to save them. For bosses it changes the economics of a failed attempt.
When your whole party wipes, the boss does not snap back to full health. It starts regenerating, but if you get back and re-engage in a timely fashion, some of its health is still missing. That is a real advantage on the next attempt, and it means a near-miss is not wasted. Keen's own framing is that this gives the party an advantage when they re-engage quickly.
The practical implication is that you should treat a wipe as a checkpoint rather than a reset. Run back fast, do not detour to restock, and re-engage while the boss is still wounded. The clock is the whole mechanic.
The same rule cuts the other way if you are the one disengaging. If you leave a boss fight to heal up and come back slowly, you are handing back the progress you made. Commit to a re-entry rather than a slow regroup.
If your boss attempts keep failing on raw durability, the best armor sets guide covers how gear unlocks now follow Flame upgrades, and the weapon gems guide covers which gems actually got stronger in this patch.
The Final 1.0 Encounter
The last progression gate in 1.0 sits behind the new region. Cinder's Cradle is north of the Veilwater Basin, past gates that are now open, and it is where the campaign's final encounter waits.
The region has two layers, and the final encounter is tied to the one above. Below, lava flows through a barren wasteland and ruins, some of it lost to the Shroud. Above, the Ancients raised the earth into floating islands with unusual fauna, intricate architecture and, in the changelog's words, unrelenting guardians. That is the endgame arena.
Beating the final encounter unlocks Flame Level 11, which raises the maximum number of Flame Altars to 16. That is the highest the system goes in 1.0, and it is also the key to pushing the Shroud back with your flame altars, a feature that requires Flame Level 11 to unlock. If you want to reclaim Shroud-covered ground permanently, the final encounter is the gate.
The changelog does not name the final boss or describe its mechanics, so treat any named phase list as community data rather than official information.
Two quality-of-life notes apply to the endgame stretch. Archaic lockpicks, needed for higher-tier locked chests and doors, start appearing in Cinder's Cradle, so bring some if you want the region's loot. And the region's point-of-interest density is lower than the central areas by design, so budget travel time.
FAQ
How many bosses are in Enshrouded 1.0?
The official 1.0 changelog does not publish a boss count or a boss list. It details the Albaneve Summits boss rework and references a final encounter behind Cinder's Cradle. Treat other boss lists as community work.
What changed about the Albaneve Summits boss in 1.0?
It got a substantial health reduction, a new exhausted phase that opens melee windows, a wider arena with grapple hook anchors, and a reworked stun meter. Its back weak point also now works for all weapons, not just arrows.
How do I stun the Albaneve Summits boss now?
Parrying its projectiles back at it is still powerful, but stun arrows and shock damage now work significantly better than before, so a party can feed the stun meter from several roles at once.
Do bosses heal if my party wipes?
They recover health over time once you leave the combat area instead of resetting instantly. Re-engage quickly after a wipe and the boss will still be wounded.
What does the final 1.0 boss unlock?
Beating the final encounter unlocks Flame Level 11, which raises the Flame Altar maximum to 16 and unlocks the ability to push the Shroud back with flame altars.
Related Guides
- Enshrouded Enemy Types in 1.0 The reworked susceptibility system that decides which damage type hurts a boss.
- Enshrouded 1.0 New Spells and Eternal Spells The shock damage, crowd control and summons that feed a boss stun meter.
- Weapon Gems in Enshrouded 1.0 Which gems got stronger, including the Toxic Reaction buff that pays off on long fights.
- Best Armor Sets in Enshrouded 1.0 How to keep your gear ahead of the endgame fights instead of farming replacements.
More Enshrouded Guides
Enshrouded ranger build for 1.0: Puncture, Barrage and Survival Instinct, the three new Eternal arrows, aim assist settings and the reworked ranger armor tiers.
How to reach Cinder's Cradle in Enshrouded 1.0, what the lava ruins and floating islands contain, its 12 new Shroud Roots, and the Flame level to bring.
How crafting works in Enshrouded 1.0: which stations exist, crafting from storage, the Gem Forge and Quick Stash Station, and the recipes the patch rebalanced.
Enshrouded has no crossplay at 1.0, so PC and PS5 cannot share a world yet. Here is how co-op works, the player cap, permissions and progress sharing.
The server tool ships free with the game and is Windows only for now. Config fields, UDP port 15637, user groups and the new Automatic enemy scaling.
An Enshrouded Elixir Well is a Shroud pocket with a Shroud Root at the bottom. What it awards, why it may not reset, and what 1.0 did and did not change.
How many enemy types Enshrouded 1.0 adds, which factions got new variants, and how the reworked damage susceptibility system changes fights.
What the Flame Altar controls in Enshrouded 1.0, the 15 and 16 Altar caps, cheaper Flame level 6 to 9 recipes, and the level 11 Shroud pushback.